Replacing and adjusting brake pads: Get started on improving your stopping power
Unless you are part of the fixed-gear revolution, or the road-disc revolution for that matter, your bike likely has rim brakes.
by Barry Fraser

Unless you are part of the fixed-gear revolution, or the road-disc revolution for that matter, your bike likely has rim brakes. It’s essential that the dual-pivot caliper brakes on your road bike are working properly before you head out on the road.
Assessment
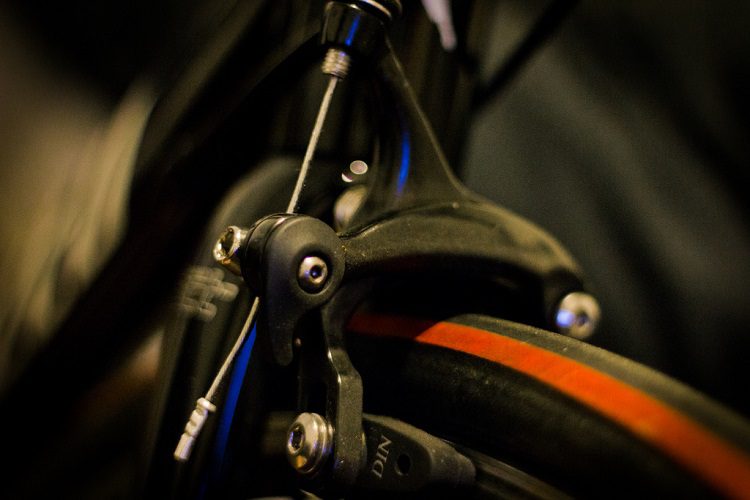
Check to see how much life is left in your current brake pads. Remove your wheels to get the best view of your pads and assess them for replacement. Most pads have wear lines built in. Vertical or diagonal grooves on the face of the pad or a wear indicator visible on the top edge will let you know when it’s time for a change. If you have a good portion of the pads available, your brakes may simply need an adjustment. If you are close to the wear lines, replace the pads to avoid any damage or unsafe conditions.
Hardware
The most economical brake pad is a cartridge that has a compound held by a metal pad holder. You can also buy different types of rubber inserts to match specific riding conditions and rim materials. Research your options and buy the most appropriate one.
Adjustment
If you are installing new pads, do so with the wheels off. Always take this time to clean the brakes as well. Remove any buildup from the pivots and springs. Try not to use solvents as they could seep into the pivots and dissolve important grease that is hard to replace. I like to put a drop of lube where the spring contacts the brake caliper arm. Also check your brake cable for any corrosion, splits in the housing or frayed wires.
Now bolt on the pads. Do your best to guess their proper position and snug them into place; you’ll do the fine adjustments once the wheel is installed.
With the wheel in place, screw your barrel adjustor in all the way, and then back it off two to three turns. With the quick release closed (the small lever at the end of the pivot on Shimano/SRAM components or the slide pin on a Campagnolo brake lever) and the cable-fixing bolt loosened, cup your hand under the rim and squeeze both pads against the rim. Back the pads off slightly and tighten the cable-fixing bolt. To dial in this initial setting, you must make the fine adjustments to the position of the pads. Because the pads are able to rotate, tilt and slide all on one bolt, they are not easy to adjust. It may take several tries to get it correct. The more you do it, the better you will get. You want the top edge of the brake pad to run parallel to the top of the rim, centred on the braking surface. To reduce brake squeal, brake pads must be toed in, which means the front of the pad touches the rim before the back. When the pads are in position and all the connections are snug, pull the brake levers. Each lever should stop at its halfway point of travel (depending on personal preference). Fine tune the brake-cable adjustment with the barrel adjustor if needed. The left and right pads should hit the rim at the same time, with no noticeable deflection of the rim when they are applied. If you see the wheel move to one side, centre the calipers using the small adjustment screw on the caliper arm. The brakes should feel firm and strong. If the brakes feel spongy, check the angle of the pads. Also ensure that the pads are centred properly on the rim and don’t have too much toe in.
You may find adjusting your brakes tricky at first, but as with any bit of bike maintenance, practice makes perfect. Always test ride your work in a controlled environment before hitting the road, and have a safe ride.
TOE IN TIP:
If you want your bike to stop on a dime, you should find one, or two, of those coins. A dime can help you toe in your brake pads. Start by unscrewing the barrel adjustor until the pads touch the rim tightly enough to create friction, but loose enough so you can still move the pads. This setup will allow you to undo the pads’ binding bolts and move the pads into position without them falling out of place. Place a coin between the back end of each pad and the rim, which will produce a natural toe-in angle. Tighten the binding bolt, screw your barrel adjustor back into position, and then put those coins back in your pocket.