Checking and replacing your chain
Ditch the worn chain to improve performance and to keep the rest of the drivetrain in top shape
by Nick Di Cristofaro
The drivetrain is the heart of any bicycle and the chain is what connects it all. Having a worn chain on your bike will result in sloppy shifting and can be a safety concern.
RELATED: Of proclamations and inertia
Checking the chain
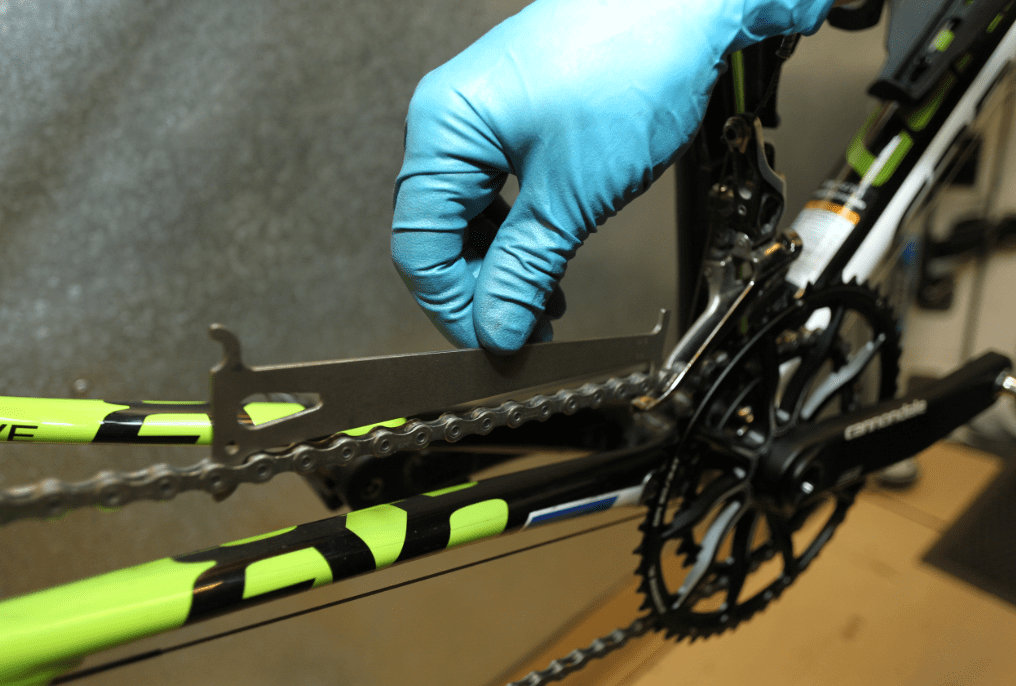
The most reliable way to check for chain wear is to use a chain-wear gauge. I like the go/no-go type, which simply tells you the chain needs be replaced (as opposed to telling you the level of wear). Such a gauge usually has a hooked end that fits onto one chain roller, which is inserted first, and another end that you try to fit into another link along a length of the chain. You should clean your chain before using the gauge as dirt and grit can skew the result. Check the wear at three spots on the chain; replace if the gauge fits in any one spot. Replacing your chain before it gets really worn will prevent other parts of the drivetrain, particularly the cassette, from wearing out prematurely. Harsh conditions, lack of proper cleaning or lubrication, and weight and power output all affect how rapidly your chain wears.
RELATED: How to get your bike really clean
Once you’ve decided to replace your chain, you must choose the correct one. It’s important to make sure you have the correct width (or speed): 6/7-, 8-, 9-, 10- or 11-speed. Always check with your components manufacturer to determine the correct chain for your bike. Generally speaking, you can mix different manufacturers as long as you use the correct speed of chain. To ensure optimal performance, however, use the manufacturer’s recommended chain for your groupset. The following instructions apply to most Shimano and SRAM chains. Newer Campagnolo chains require different procedures.
Sizing and installing and your new chain

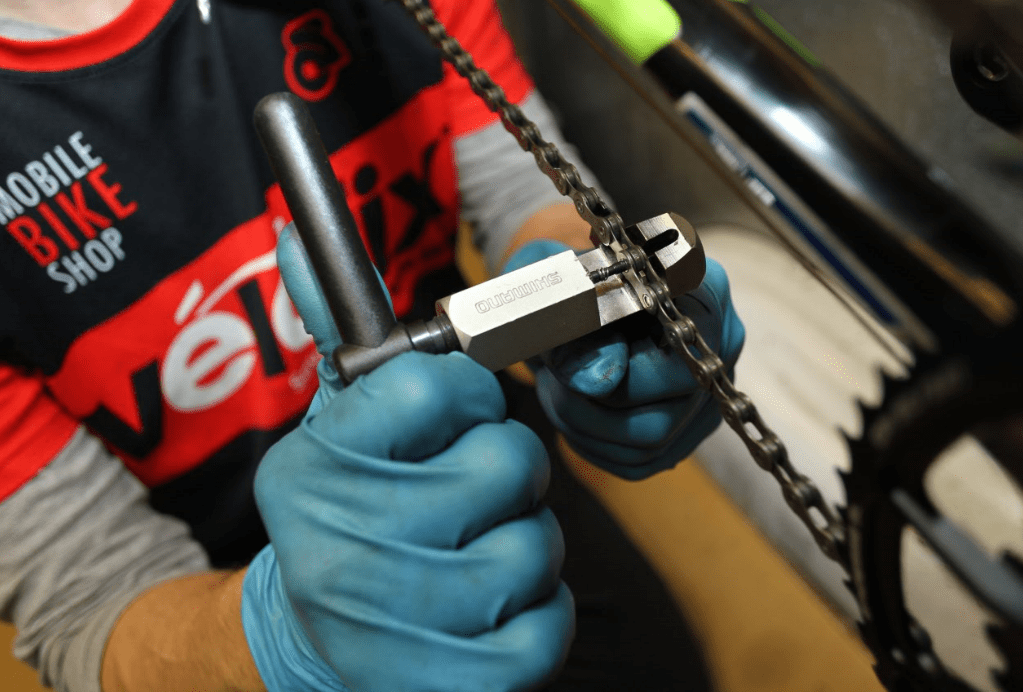
To remove the old chain, shift the bike into the small cog and small chainring. If you have a quick link on your chain, you can unclasp it with special link pliers or by hand, squeezing the ends together. (Using pliers is much easier.) If you do not have a quick link, you must push out a pin with a chain tool, using the correct tool for the width of your chain. Place the tool onto the chain and push out the pin.
Feed the new chain through the front derailleur, around the small cog, around the upper jockey wheel, through the cage and back around the lower jockey wheel. Some chains are directional so ensure you orient yours correctly. Next, trim the chain to the correct length. There are a few methods that different manufacturers recommend. The following method works for most double chainring setups.
With the chain around the rear derailleur, small cog and small chainring, pull both ends of the chain together until you get some tension in the rear derailleur cage. It’s at this point that you want to trim the chain. There should be approximately 10 mm of clearance between the chain link at the bottom of the upper jockey wheel and top of lower length of chain that runs from the rear derailleur to the chainring. If you are fastening the chain with a pin, ensure you trim the chain so that you have one end with outer chain plates and one with inner chain plates to make the connection. If you are using a quick link, both ends of the chain should have inner plates exposed. Use your chain tool to push in a pin to close the chain or install the quick link. When you use the chain tool, do not push the pin in too far and out the other end. Once you push in the pin, you must break off the excess with pliers or the end of the chain tool. Ensure the link moves freely. If it sticks, lightly work the link back and forth with your hands. Then, your machine will be riding smoothly once again.
Checking for cassette wear

As a general rule of thumb, replace your cassette after you’ve replaced three chains. You will know your cassette is worn if it skips and jumps after installing a new chain (assuming the rear derailleur is tuned). It is sometimes hard to determine the level of cassette wear by eye. There is, however, a trick that can help you.
RELATED: 5 easy steps to make your components last longer
Put your bike on a stand. Hold the rear brake lever to lock the rear wheel. Place the drive-side crank arm at 3 o’clock and put some pressure on it with your hand while watching the chain links on the rear cassette. See if the links ride up on the cog teeth. Replace the cassette if you notice excessive movement.