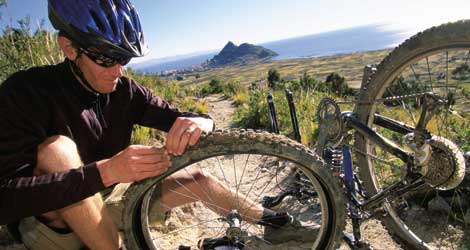
5-Minute Flat Repair
Inflate the tire fully while your friends sit impatiently on their top tubes. A quality pump will save you here.

Flat. It’s the cyclist’s four-letter F-word. But you can reduce the frustration for yourself and your riding mates by taking an efficient and methodical approach to get rolling again. It all starts before you leave the house by being prepared with the following five items: Pump; Tire levers; Extra tube(s); Five dollar bill; CO2 cartridge and inflator (optional). If you have these items, fixing a flat is no trouble at all.
Spin the wheel to inspect for culprits on the surface of the tire like embedded nails or glass. Remove the wheel from the frame, let any remaining air out of the valve and place the wheel at your feet. To make things easier, pinch the tire beads together around the entire circumference of the rim so that they both rest together in the centre channel. It may be possible to force the tire off the rim using both hands while prying with your thumbs. Push both beads over the edge of the rim, but once you can get a finger under the outer bead, then you can slide the rest of it off while leaving the other bead on. If the bead is too tight to do this by hand, gently pry a tire bead over the edge of the rim with your tire lever while hooking the other end on a spoke. Be cautious if you have tubeless or tubeless-ready tires as the more fragile bead rubber can be damaged, compromising its capability to seal properly. Take your other tire lever and pry about 10 to 15 cm away from the first and slide it around to free the bead. Remember to leave one bead in the rim to speed up re-installation.
Unscrew the valve nut and remove the tube. Running tubeless tires? Remove the valve and place it in your pocket. Inspect the inside of the tire by running a glove or the hem of your jersey around it to catch on any objects that have come through to cause the puncture. Once you’re confident that there’s no debris on or in the tire, have a quick look at the spoke hole area of the rim to make sure that the rim strip is intact and that there are no visible holes, as this can cause a puncture as well. If the rim strip is damaged or there’s a gash in the tire, this is where the five dollar bill can come in handy because it can be used to cover the damaged area.
Before you insert your fresh tube, give it some shape by giving pumping in some air. Locate the valve hole and start there. Tuck the slightly-inflated tube into the tire and then use your thumbs to get the tire bead back on. If tire levers were needed for removal, use them to get the last bit of the bead onto the rim. Make sure that the tube is not being pinched under the bead anywhere around the tire, as this can cause a blowout. That bit of air in the tube before installation helps prevent this.
Screw the nut back onto the valve stem before attaching your pump and then inflate the tire fully while your friends sit impatiently on their top tubes. A quality pump will save you here. Or, if you have CO2, give it a blast and be on your way.
Steve Martins left a promising teaching career to become a shop rat at Hardcore Bikes in Edmonton and to ride as much as life allows.

